Probably the most important part of any business is building an email list of customers in this post I am going to walk you through the steps you can follow to put in place the exact system used by the top businesses in the world.
More...
UPDATE :- Thrive Content Builder now called Thrive Architect same product just better and easier to use....
Watch here as I build a 3 step sales funnel using AWeber
The first tool you are going to need for this to work smoothly is a good email marketing system. The one I use and will be showing you today is called Aweber.
If you are new to building email lists then lets just run through what an email marketing system is. Basically this tool allows you to build lead capture forms, (you have probably seen this all over the internet and even signed up for something in the past). Once you have these forms, these can be placed on web pages, blogs and even social media platforms and then marketed, all good email marketing tools enable you to build unlimited forms.
You can then start building, when you have people on your list, you can start sending out emails directly to them. Most people setup what's called an email campaign which is a series of emails delivered over e set period of time. The beauty of this is that you build it all once and they get delivered every time you get a new email subscriber. You can also send what they call broadcasts at any time you want.
If you have an account with Aweber that's great. You can now log in to your account if you need to get an Aweber account you can sign up and get the first 30 days for free.
More information on email list building read :- How to build an email list of 1000 subscribers

Lets go and log into my account and show you how simple this is to set up.
From the main dashboard you want to click on manage lists and then create list, as previously stated aweber allows unlimited lists and sign up forms, so keeping your lists segmented is always a good thing as you may want to send out an individual email to certain lists.

Just fill in the details such as Company name, website and address, these are not too important but to two you need to get right is sender name and email these will be seen directly by your customers and remember to make the name in line with your email form... this way they can find it easily in their inbox.
Click next and then complete the details by giving your list a name and description.

Next is to set up your email confirmation, this will be an email that is sent out to get people to confirm that they are okay for you to send them more emails. There is an option to turn this off, but you will definitely have a more responsive list with this left on.
Use the drop down to choose a subject line and then edit the description to suit your offer.
Your list is now created !
Next you need to choose List options in the sub menu far right. And go through setting up email notifications, this sends you an email every time someone signs up to your list. This is great for businesses that offer such things as a call back service.
Great article on Email Marketing thought I would share for others to benefit.. check it out

Personalizing your list enables you to add an email signature and social media accounts.
The confirmed opt in is where you can opt out of the confirmation email if you choose.
Now to build your sign up form...

This is where you will collect your customers details. Click on sign up forms and then create first sign up form. This takes you to the design page where there are loads of templates you can choose so no design skills needed at all.
I am going to use the default template and if you are going to use Thrive landing pages to build your opt in page like me then this is fine to leave as it is. You can add different fields here but the most popular would be name and email address. The more fields you have eg telephone number etc your conversion will be lower. but this is sometimes a good thing to weed out tyre kickers so as not to waste your time.
Save this and move to set two... settings

Here you can name your form and choose a thank you page to send your new customer too once they have signed up. You can find out more about custom thank you pages on this post.
Create your own profit pulling sales funnel
A custom thank you page is always best here. Save your form and then head to the final step.

Now to grab your form code so you can place this where your form will sit, either a landing page, blog or website. Click the I will install my form then choose raw html version, copy all the code and place into a notepad or word document this will make it easier to locate when you place it on your page.
So that has shown you a very quick overview of how to set up your first sign up form in Aweber, now to quickly show you how you can use the WordPress platform and a plugin called Thrive Content Builder to build your whole system. UPDATE Thrive Content Builder now called Thrive Architect.

From your WordPress dashboard create a page and then click on edit with Thrive content builder this opens up the page so it can be edited, I have chosen a landing page template from the huge variety that Thrive have already pre-built.
To put in the code from Aweber I just hoover over the opt in box element click and then choose connect with service. Create a connection, then choose html code from the drop down. You can then paste in your code and generate fields.
You are now good to go... well done !
Any questions ? Need help ? post your questions and comments below, I would love to hear from you.
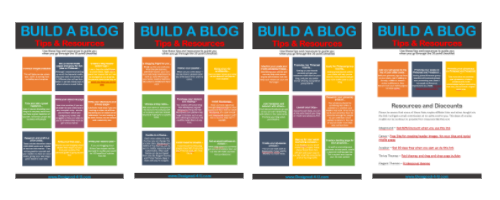
PLUS - We will keep you updated with tips, products and resources all about blogging. By filling in the form we have your consent to do this, and you can opt out at any time.
Never Build A Blog Without A Proven Guide
Build your own blog and start making money by simply following our proven 30 point checklist and resource pack : completely for free!
